So you’ve made your screen recording, but it seems a little long, and there are gaps in the video that don’t add any value. Maybe your recording was made of the entire screen, but you just wanted to focus on a single application window.
How can you edit the screen recording video to create a great video your audience will love?
We’ll cover a few easy ways to trim, crop, and edit your screen recording regardless of the device you’re working on.
Wouldn’t it be great if your video didn’t need any editing? You can also save a lot of video editing work by getting your screen recording right up front.
Edit Screen Recording Videos Online Using RecordJoy
RecordJoy is an online screen recorder that offers some great advantages to save on post-recording editing. The easy-to-use interface enables even amateurs to produce professional-looking screen recordings and to do basic editing.
Advantages Of Using An Online Screen Recorder
Because RecordJoy is an online screen recorder, you don’t have to download or install any software. The tool runs in your browser, so it’s also operating system independent. Are you using a Mac or a PC? No problem. Here are the easy steps to make your screen recording:
Head to the RecordJoy website and sign up for their free trial. The free trial gives you most benefits of the paid premium account.
Only three settings need your attention before you begin recording.
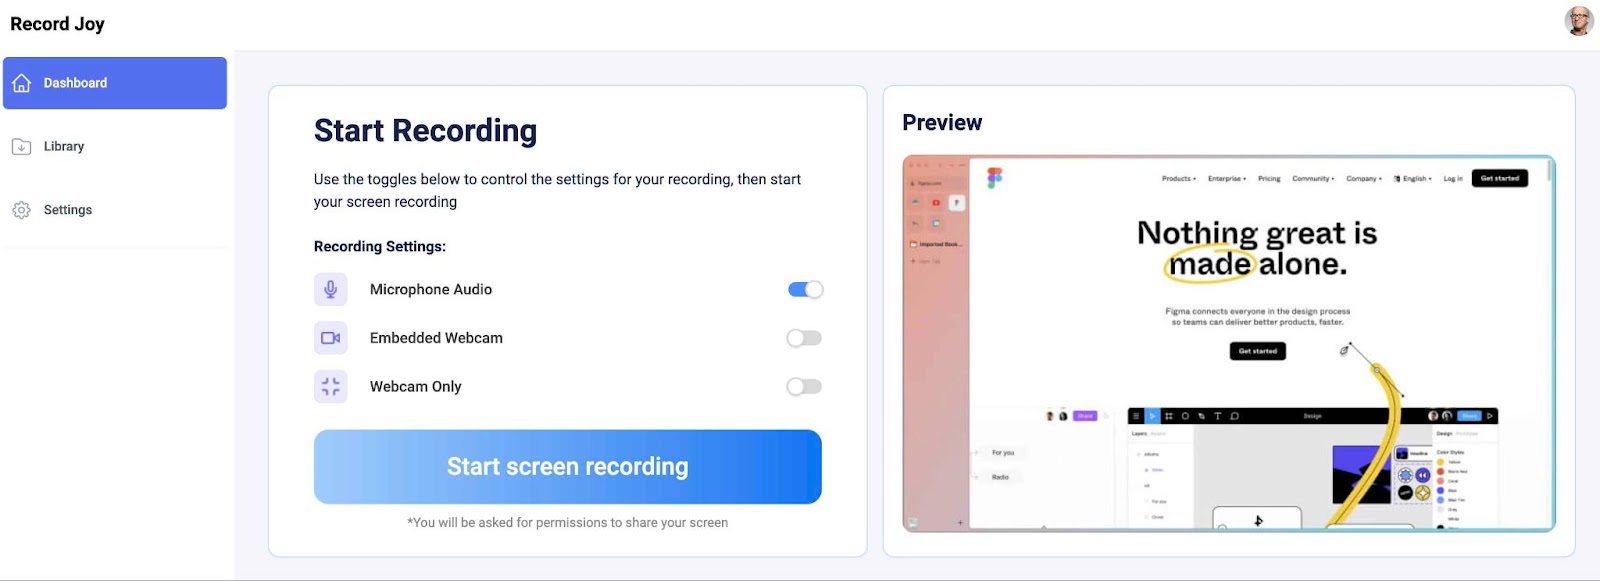
- Enable or disable the microphone. Will you be narrating while making your screen recording, or do you want rather add audio later?
- Enable or disable the webcam. This option allows you to record your screen and webcam at the same time. The webcam video will be embedded in the top corner of the screen.
- The third option is only to record your webcam. Leave this option disabled when making a screen recording.
Now click “Start Screen Recording”. You’ll be presented with options to choose which part of your screen you’d like to record.
You can choose to record your entire screen, but it may be better to choose a specific part to record rather. This will reduce the editing and video cropping you would otherwise need to do later.
You can record a particular application window or even a single tab in your browser.
Once you’ve made your selection, click on “Share”. Your screen recording will start after a 3-second countdown.
A great way to keep your videos as short as possible and reduce the video-editing time required is to plan your recording before starting. Have a general outline or storyboard of what your video will be about, and also write a script.
If you do this, there will be fewer periods of umming and ahhing and more engaging, informative video content.
Once you’re done with your screen recording, click “Stop Sharing” and stop the recording.
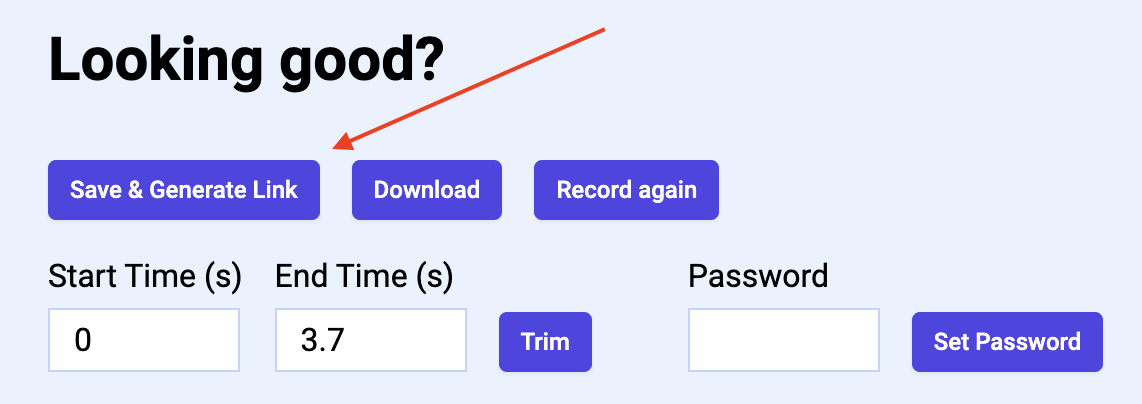
RecordJoy gives you some basic options for editing your screen recording. You can trim the video by adjusting the start and end times. This helps you get past the first few seconds when you’re getting ready for action and the last few seconds after you’ve concluded your presentation.
You’ve got an audience that needs to see the video, but how will you get it to them? Sending big video files can be frustrating.
RecordJoy makes it easy. Instead of downloading the video, rather save it to their servers.
You can share your screen recording video clips directly online by sending someone the link to the video. You can even password-protect the video to restrict who can watch it.
There’s also an option to copy the embed code and then insert that on your blog or social media.
If you don’t want to re-record your video but still need to edit your screen recording, here’s how you can do it on a PC or a Mac.
How To Edit Screen Recording On Windows PC
Windows has Built-in and 3rd party options. The 3rd party options are mostly paid and include programs like Adobe Premiere Pro, Final Cut Pro, or Da Vinci Resolve. These are expensive and are probably overkill for editing a screen recording.
Windows Movie Maker comes pre-installed on Windows 10 and 11 and is your best bet. Run the program, select the video clip you want to edit, and click “Show Timeline”
Trim
Drag the playhead to where you want the video to start and then click Clip > Set Start Trim Point. Drag the playhead to where you want the video to end, and then click Clip > Set End Trim Point.
Resize
If you want to reduce the size of the video file you can do so before saving the edited video. Go to Settings in the menu and adjust the Resolution and Frame Rate options. You can use 480p or 720p for most instructional screen recordings. Use 1080p if you don’t mind having a bigger file or need a higher resolution to show more detail.
Choose a frame rate of 25fps. You only need higher frame rates if you have a slow-motion video that you want to display smoothly.
Rotate
Select Rotate Video in the Quick Tools section and choose the video you want to rotate. Click Rotate Right or Rotate Left to rotate the video by 90 degrees.
Flip
Go to the Visual Effects tab and look for the Mirror section. You can choose to flip the video horizontally (Mirror Horizontal) or vertically (Mirror Vertical).
Crop
Select Crop Video in the Quick Tools section. Click and drag the corners of the crop frame that appears. You can change the aspect ratio, but keeping it at 16:9 is your best option.
How To Edit Screen Recording On Mac
If you’re using a Mac, there are also built-in and 3rd party options to edit your screen recording video. iMovie comes standard on Mac and has more than enough capability for screen recording editing.
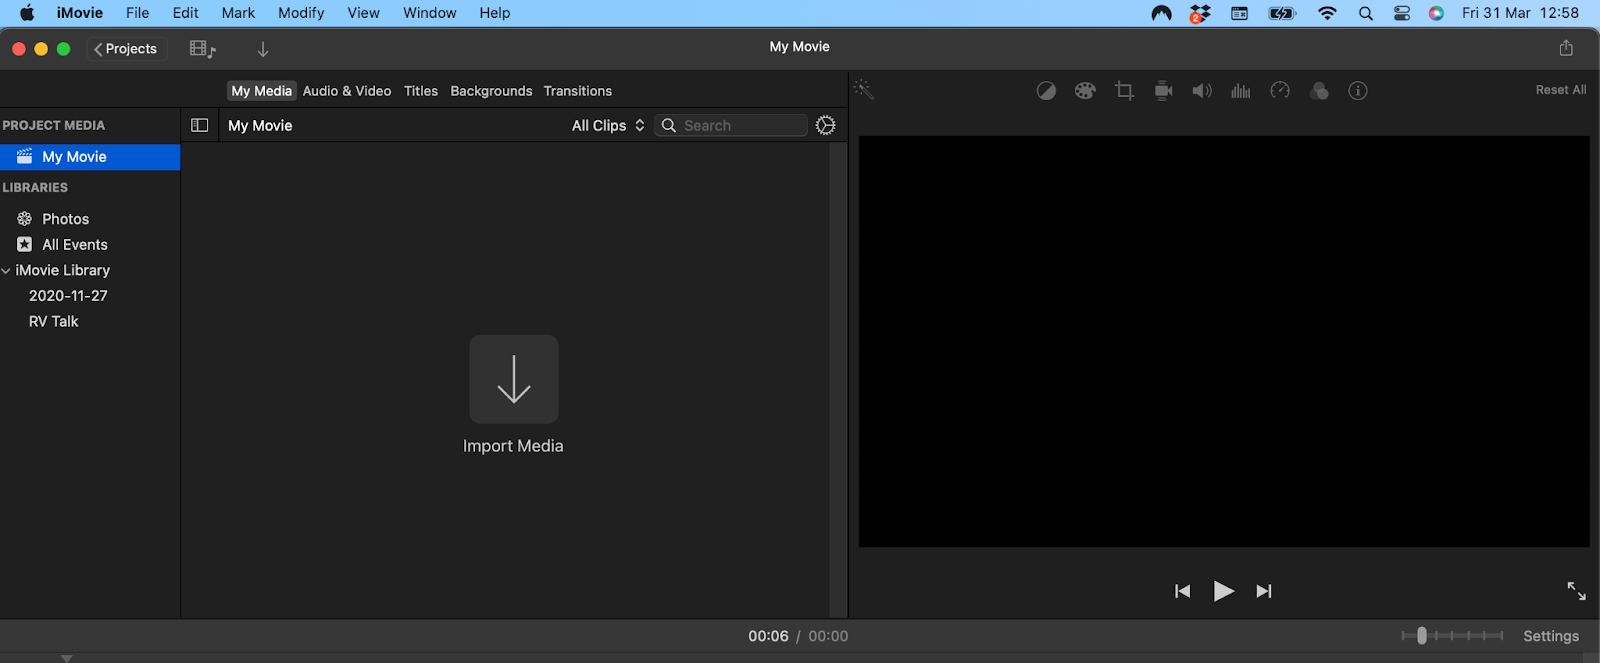
Once you’ve opened the application and added the video to your media section, here are the steps to edit the video:
Trim
Drag across the clip in the timeline while holding in the R-key to select the range of frames you want to keep. Now click the clip while holding the Control button and choose Trim Selection.
Resize
Once you’re ready to save your video, use the Share menu option and select a lower resolution and frame rate to reduce the video file size.
Rotate
Click Rotate Clockwise or Rotate Counterclockwise in the tool menu above the video preview.
Flip
In the toolbar above the preview player, click the Clip filter and audio effect button and then select the Flipped filter option.
Crop
On the toolbar above the video preview player, click the Crop To fill button. Drag the corners of the cropping frame to enclose only the area you want in the video. The 16:9 aspect ratio will be automatically retained.
Conclusion
While it’s good to know how to do some basic video editing, it’s even better when you don’t have to edit your screen recording at all. If you plan your presentation well and then use an online screen recorder like RecordJoy you can avoid a lot of video editing effort.